If you’ve ever been frustrated by the inefficiencies of the Maven Release Plugin—multiple builds, unnecessary commits, and endless waiting—you’re not alone. Enter the Lean Maven Release, a streamlined alternative to automate and optimize your Maven release process.
This method eliminates repetitive steps, reduces build times, and minimizes interactions with SCM (Source Control Management). Let’s break it down.
Why Choose Lean Maven Release?
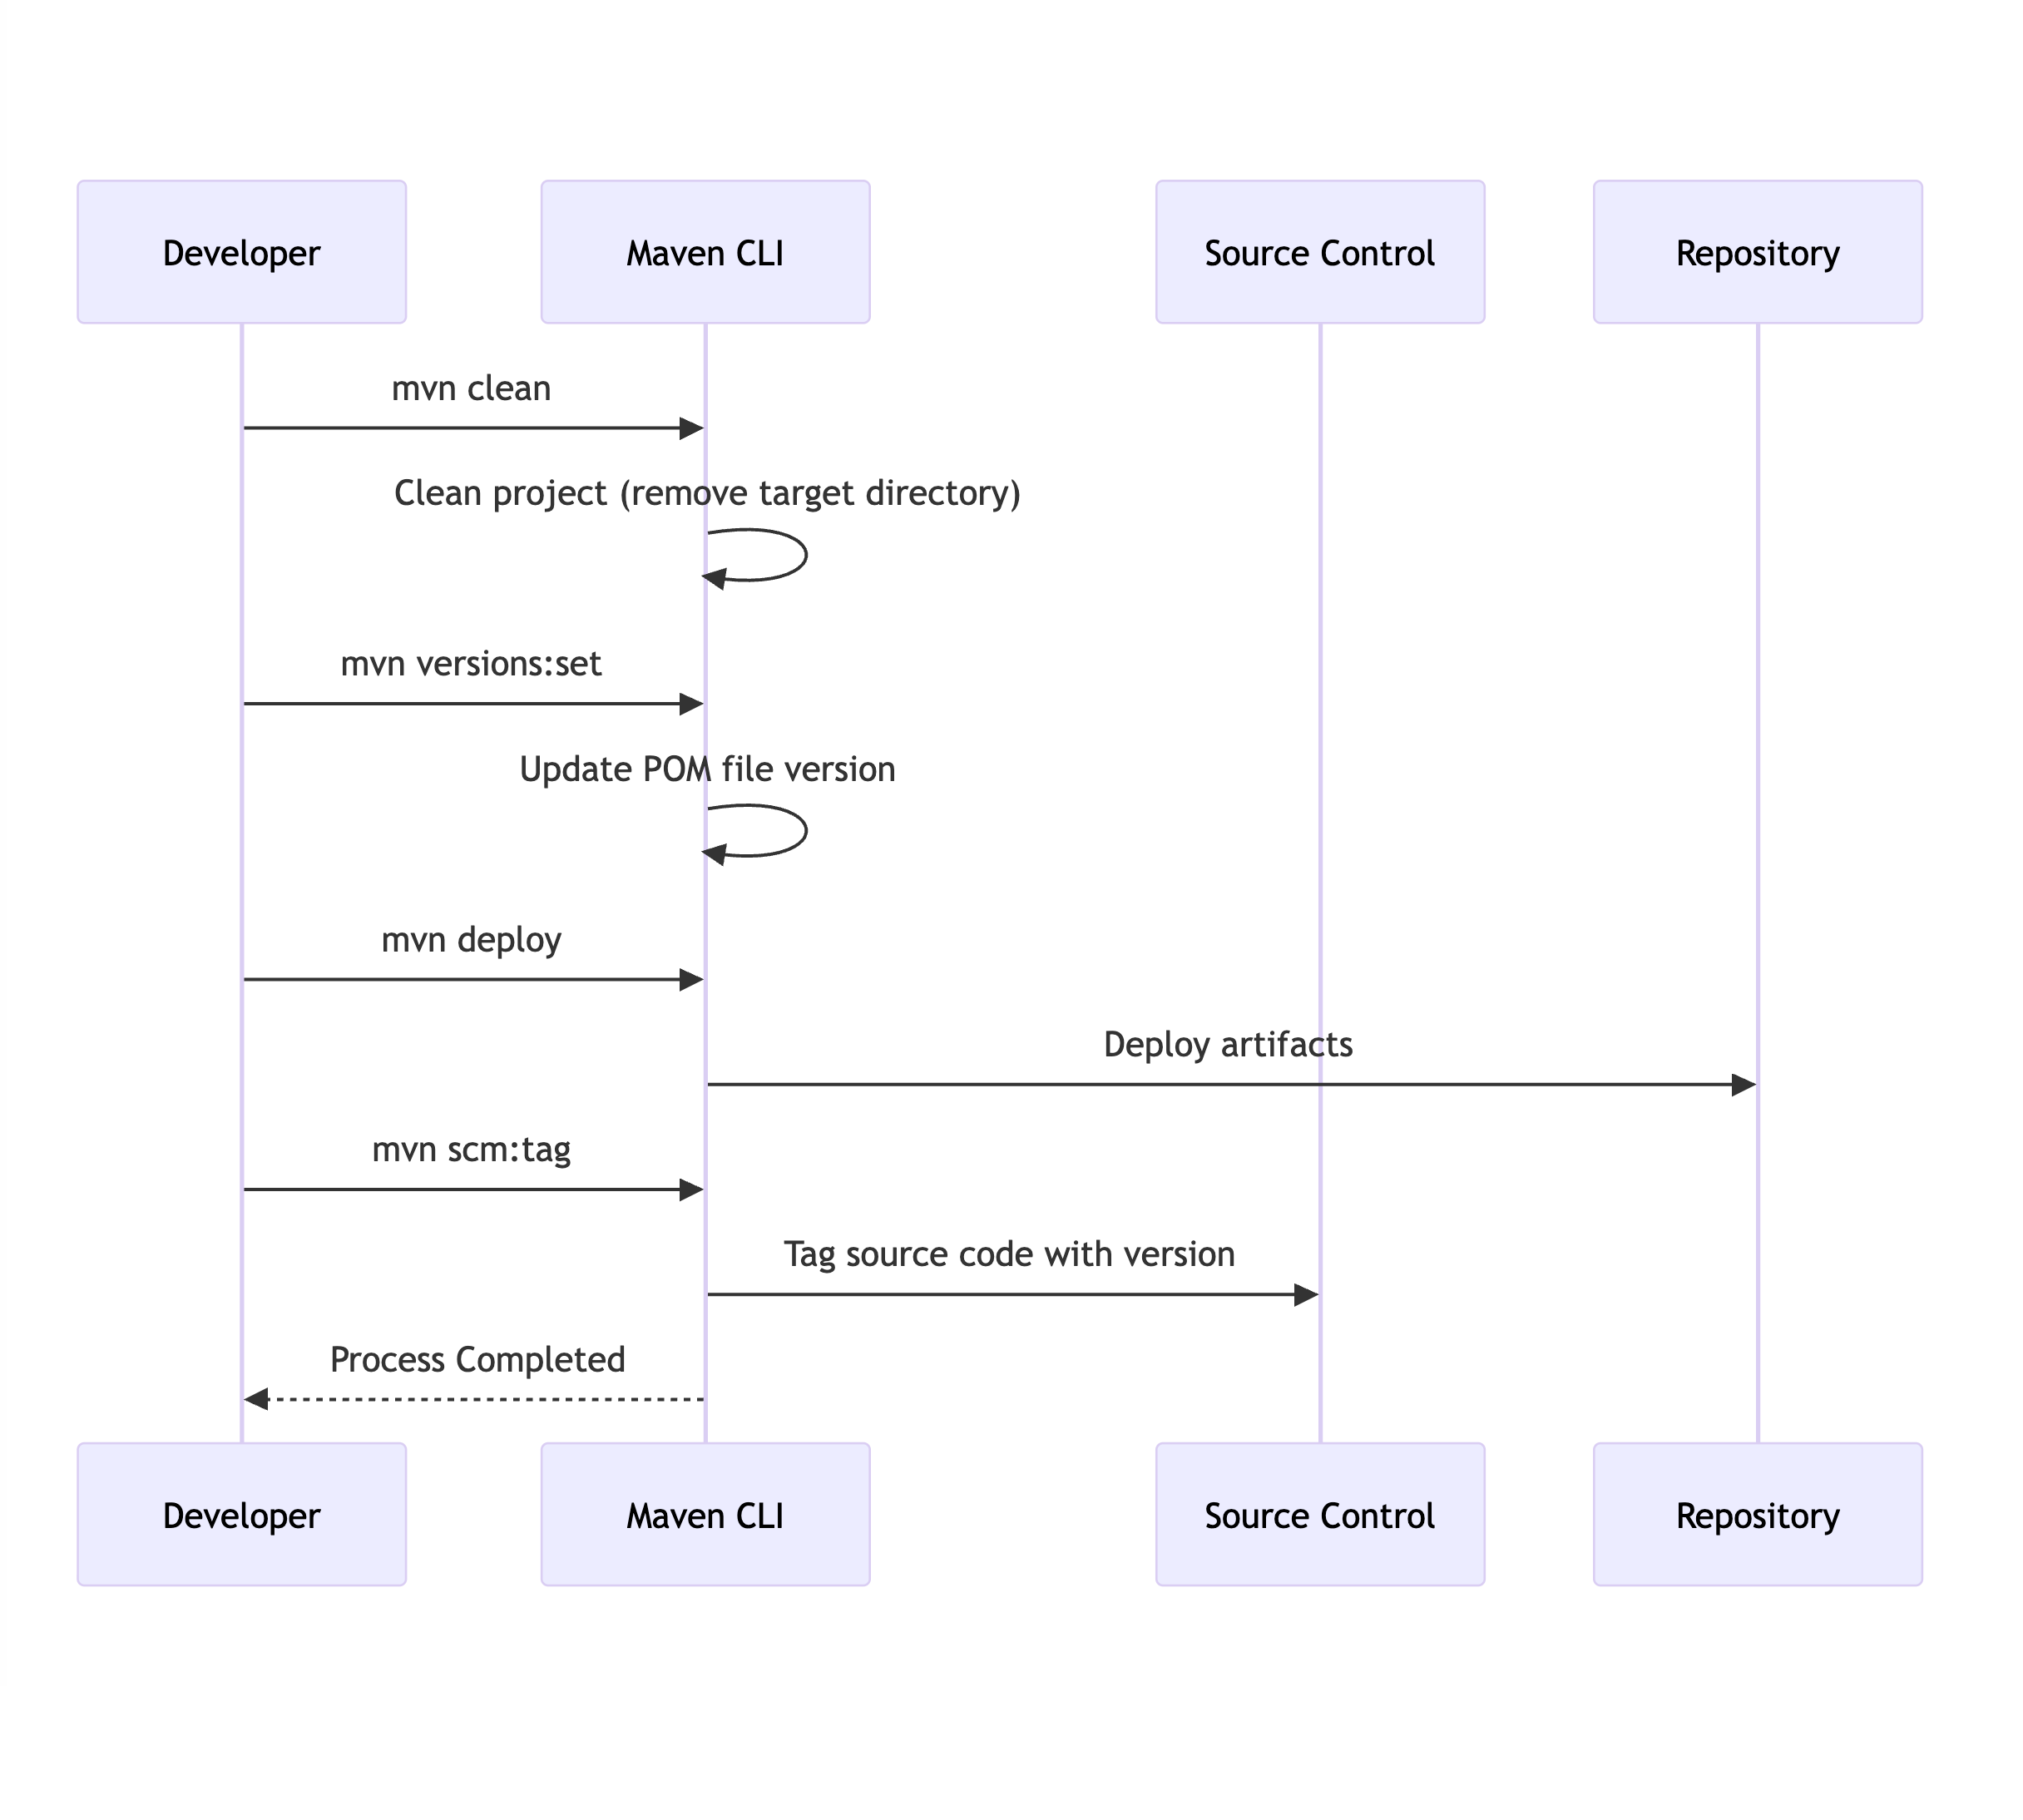
The Lean Maven Release strategy replaces the repetitive steps of the Maven Release Plugin with a more efficient, scriptable process. Instead of multiple check-ins to SCM and redundant builds, you can reduce the process to just four commands:
mvn clean
mvn versions:set
mvn deploy
mvn scm:tag
This approach can be set up in both Jenkins and TeamCity, saving hours for teams practicing Continuous Delivery or working in environments with frequent build requirements.
Benefits of Lean Maven Release
How much of an improvement can you expect? Let’s compare the two approaches:
| Step | Lean Maven Release | Maven Release Plugin |
|---|---|---|
| Clean/Compile/Test Cycle | 1 | 3 |
| POM Transformations | 0 | 2 |
| SCM Commits | 0 | 2 |
| SCM Revisions | 1 (binary tag) | 3 |
The difference is clear: Lean Maven Release significantly reduces overhead and complexity.
Getting Started
Here’s how to implement the Lean Maven Release process in your project:
1. Add Required Maven Properties
Ensure the necessary Maven plugin versions are defined in your pom.xml:
<properties>
    <maven.compiler.plugin.version>3.1</maven.compiler.plugin.version>
    <maven.release.plugin.version>2.5</maven.release.plugin.version>
    <maven.source.plugin.version>2.2.1</maven.source.plugin.version>
    <maven.javadoc.plugin.version>2.9.1</maven.javadoc.plugin.version>
    <maven.gpg.plugin.version>1.5</maven.gpg.plugin.version>
</properties>
2. Configure Deployment Paths
Set up local or remote deployment paths in the <distributionManagement> section of your pom.xml:
Local Deployment Example:
<distributionManagement>
    <repository>
        <id>internal.repo</id>
        <name>Internal Repo</name>
        <url>file:///${user.home}/.m2/repository/internal.local</url>
    </repository>
</distributionManagement>
<distributionManagement>
<repository>
<uniqueVersion>false</uniqueVersion>
<id>corp1</id>
<name>Corporate Repository</name>
<url>scp://repo/maven2</url>
<layout>default</layout>
</repository>
</distributionManagement> 3. Add Maven Plugins
Add the necessary Maven plugins to your pom.xml:
<build>
    <pluginManagement>
        <plugins>
            <plugin>
                <groupId>org.apache.maven.plugins</groupId>
                <artifactId>maven-compiler-plugin</artifactId>
                <version>${maven.compiler.plugin.version}</version>
            </plugin>
            <plugin>
                <groupId>org.apache.maven.plugins</groupId>
                <artifactId>maven-release-plugin</artifactId>
                <version>${maven.release.plugin.version}</version>
                <configuration>
                    <useReleaseProfile>false</useReleaseProfile>
                    <releaseProfiles>release</releaseProfiles>
                    <goals>deploy</goals>
                </configuration>
            </plugin>
            <plugin>
                <groupId>org.apache.maven.plugins</groupId>
                <artifactId>maven-source-plugin</artifactId>
                <version>${maven.source.plugin.version}</version>
            </plugin>
            <plugin>
                <groupId>org.apache.maven.plugins</groupId>
                <artifactId>maven-javadoc-plugin</artifactId>
                <version>${maven.javadoc.plugin.version}</version>
            </plugin>
            <plugin>
                <groupId>org.apache.maven.plugins</groupId>
                <artifactId>maven-gpg-plugin</artifactId>
                <version>${maven.gpg.plugin.version}</version>
            </plugin>
        </plugins>
    </pluginManagement>
</build>
4. Define the Release Profile
Include a release profile to configure the Maven deployment process:
<profiles>
    <profile>
        <id>release</id>
        <properties>
            <activatedProperties>release</activatedProperties>
        </properties>
        <build>
            <plugins>
                <plugin>
                    <groupId>org.apache.maven.plugins</groupId>
                    <artifactId>maven-source-plugin</artifactId>
                    <executions>
                        <execution>
                            <id>attach-sources</id>
                            <goals>
                                <goal>jar</goal>
                            </goals>
                        </execution>
                    </executions>
                </plugin>
                <plugin>
                    <groupId>org.apache.maven.plugins</groupId>
                    <artifactId>maven-javadoc-plugin</artifactId>
                    <executions>
                        <execution>
                            <id>attach-javadocs</id>
                            <goals>
                                <goal>jar</goal>
                            </goals>
                        </execution>
                    </executions>
                </plugin>
            </plugins>
        </build>
    </profile>
</profiles>
5. Optional: Configure Assembly Plugin
If required, add an assembly descriptor for packaging:
<assembly>
    <id>plugin</id>
    <formats>
        <format>zip</format>
    </formats>
    <includeBaseDirectory>false</includeBaseDirectory>
    <dependencySets>
        <dependencySet>
            <outputDirectory>/</outputDirectory>
            <useProjectArtifact>true</useProjectArtifact>
            <useTransitiveFiltering>true</useTransitiveFiltering>
        </dependencySet>
    </dependencySets>
</assembly>
6. Skip GPG Signing (Optional)
If you don’t want to sign packages, you can skip the GPG plugin during deployment:
mvn deploy -Prelease -Dgpg.skip=true Conclusion
This Lean Maven Release approach allows you to:
- Eliminate unnecessary SCM interactions.
- Reduce build times significantly.
- Simplify deployment workflows.
This method is ideal for teams practicing Continuous Delivery(CD) or dealing with frequent release cycles. For more details, check out Axel Fontaine’s blog post, which inspired this guide.
Let me know what you think!