Migrating from JUnit 4 to JUnit 5 (Jupiter) can feel daunting, especially if your project is built on older versions of Spring Boot. This guide breaks down the process step-by-step, helping you navigate dependency adjustments, IDE tweaks, and annotation replacements.
Prerequisite: Spring Boot Compatibility
Before starting, note that the SpringExtension required for JUnit 5 is only available starting from Spring 5. Unfortunately, spring-boot-starter-test 1.5.x is based on Spring 4, meaning JUnit 5 isn’t natively supported until you upgrade to Spring Boot 2.x or later.
For more details, check:
Step 1: Adjust Dependencies
To use JUnit 5 in a Spring Boot project, you’ll need to exclude the default JUnit 4 dependency and explicitly add JUnit 5 dependencies.
Current Dependency Configuration (JUnit 4)
<dependency>
    <groupId>org.springframework.boot</groupId>
    <artifactId>spring-boot-starter-test</artifactId>
    <scope>test</scope>
</dependency>
Updated Dependency Configuration (JUnit 5)
Exclude JUnit 4 and add JUnit 5 dependencies:
<dependency>
    <groupId>org.springframework.boot</groupId>
    <artifactId>spring-boot-starter-test</artifactId>
    <scope>test</scope>
    <exclusions>
        <exclusion>
            <groupId>junit</groupId>
            <artifactId>junit</artifactId>
        </exclusion>
    </exclusions>
</dependency>
<dependency>
    <groupId>org.junit.jupiter</groupId>
    <artifactId>junit-jupiter</artifactId>
    <scope>test</scope>
</dependency>
Step 2: Update Imports
With JUnit 5, most of the imports and annotations from JUnit 4 have been replaced. Use your IDE to quickly update these references.
Global Find and Replace:
- Replace Imports
import org.junit.Test- →
import org.junit.jupiter.api.Test
- →
import org.junit.runner.RunWith- →
import org.junit.jupiter.api.extension.ExtendWith
- →
import org.springframework.test.context.junit4.SpringRunner- →
import org.springframework.test.context.junit.jupiter.SpringExtension
- →
- Replace Annotations
@RunWith(SpringRunner.class)- →
@ExtendWith(SpringExtension.class)
- →
Step 3: Replace Annotations in Test Classes
After updating imports, your test classes need to use JUnit 5’s new annotations.
Before (JUnit 4)
import org.junit.Test;
import org.junit.runner.RunWith;
import org.springframework.test.context.junit4.SpringRunner;

@RunWith(SpringRunner.class)
public class ExampleTest {
    @Test
    public void shouldPass() {
        // test logic
    }
}
After (JUnit 5)
import org.junit.jupiter.api.Test;
import org.junit.jupiter.api.extension.ExtendWith;
import org.springframework.test.context.junit.jupiter.SpringExtension;

@ExtendWith(SpringExtension.class)
public class ExampleTest {
    @Test
    public void shouldPass() {
        // test logic
    }
}
Step 4: Use IDE Features for Dependency Updates
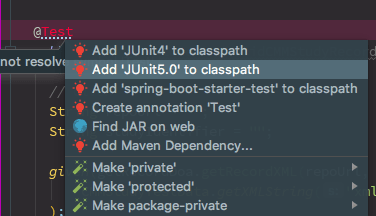
If you’re using IntelliJ IDEA or similar IDEs, enable dependency management features to simplify updating your pom.xml. Use the following snippets if you prefer manual configuration:
<dependency>
    <groupId>org.junit.jupiter</groupId>
    <artifactId>junit-jupiter-api</artifactId>
    <scope>test</scope>
</dependency>
Why Upgrade to JUnit 5?
JUnit 5 offers several advantages over JUnit 4, including:
- Better modularity: You can use only the features you need.
- New annotations: More flexibility with
@BeforeEach,@AfterEach, and others. - Parameter injection: Cleaner test code through parameterized tests.
Conclusion
Upgrading from JUnit 4 to JUnit 5 in Spring Boot applications ensures your project stays up-to-date with modern testing frameworks. For more customisation, you can explore the official JUnit 5 documentation.
Let me know how the migration process goes, and happy testing!
Leave a Reply